|
JeVois
1.23
JeVois Smart Embedded Machine Vision Toolkit
|
|
|
JeVois
1.23
JeVois Smart Embedded Machine Vision Toolkit
|
|
The easiest to get started is to use JeVois-A33: JeVois Inventor graphical user interface
Below are alternative approaches.
The JeVois smart camera is used like a regular USB camera. To get started with a Mac host computer:
Download a disk image from http://jevois.org and flash it to a MicroSD card.
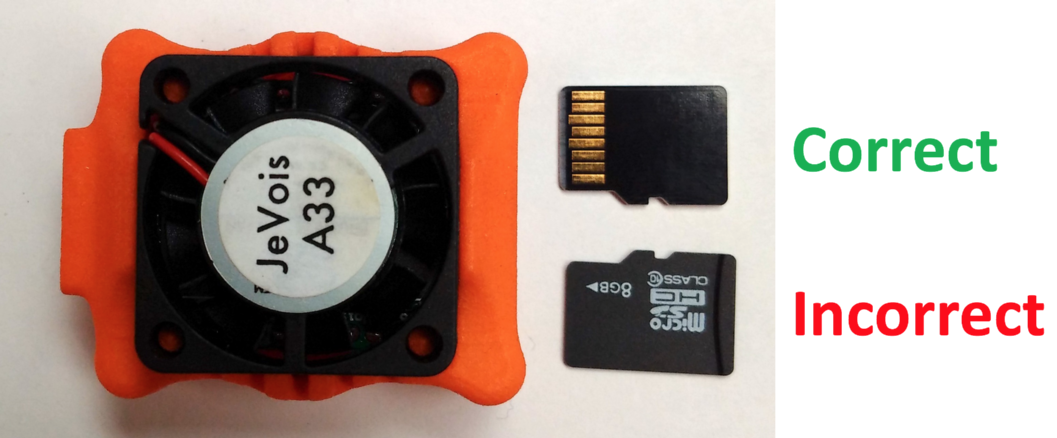
Insert MicroSD card into JeVois smart camera, with the MicroSD contacts pointing up as shown below.

Connect camera to a host computer. The smart camera requires up to 3.5 Watts of power, which is above the limit of what a single USB 2.0 port is designed to supply, but is within the limits of a single USB 3.0 port. It is important to use a high-quality USB-to-miniUSB cable that can carry that full power without loss. Look for a cable with 24awg power wires. It is recommended that you use a USB 3.0 port on your host computer, as those provide more power. If that is not available, you can use a USB Y-cable to connect to two USB 2.0 ports on your host computer, or to one USB 2.0 port and one external USB power supply (e.g., phone charger). Make sure that you do not use a USB hub, unless that hub has a strong external power supply (transformer, wall adapter).
Observe the LED on the smart camera next to the USB connector:
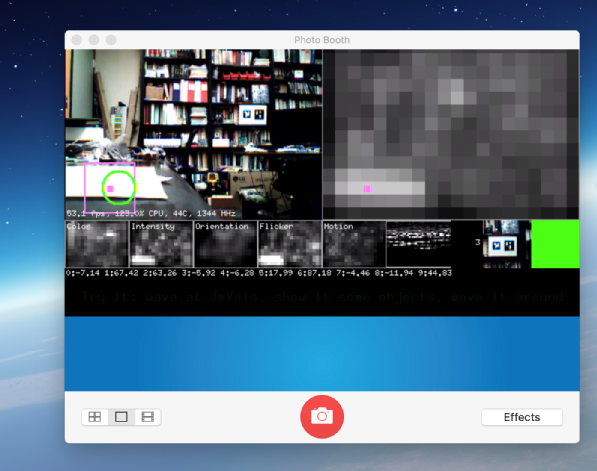
Start a video capture software. Here we will use the bundled-in PhotoBooth app that is in your Applications directory.
Launch PhotoBooth from your Applications folder. You should see this:
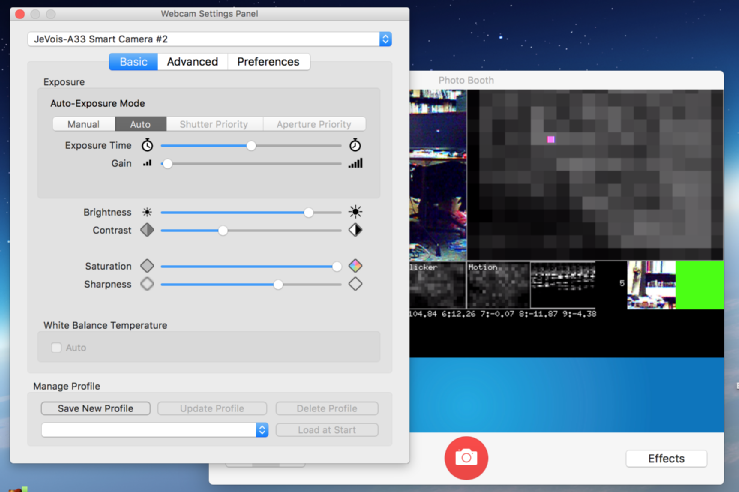
Photobooth does not give you access to contrast, exposure, etc controls. But you can get third-party apps from the App Store to do that. Here is for example using Webcam Settings after getting it from the App Store (free):
You can also try VLC, Skype, Facetime, etc. The built-in Photobooth app is very picky and will refuse to use the camera if the camera exposes BAYER or RGB565 video modes, too many modes, etc. It also does not allow you to select video resolution. To use the JeVois camera on a mac it is recommended that you configure it with only one available video resolution (one entry in your videomappings.cfg file). See UserModes for more info.
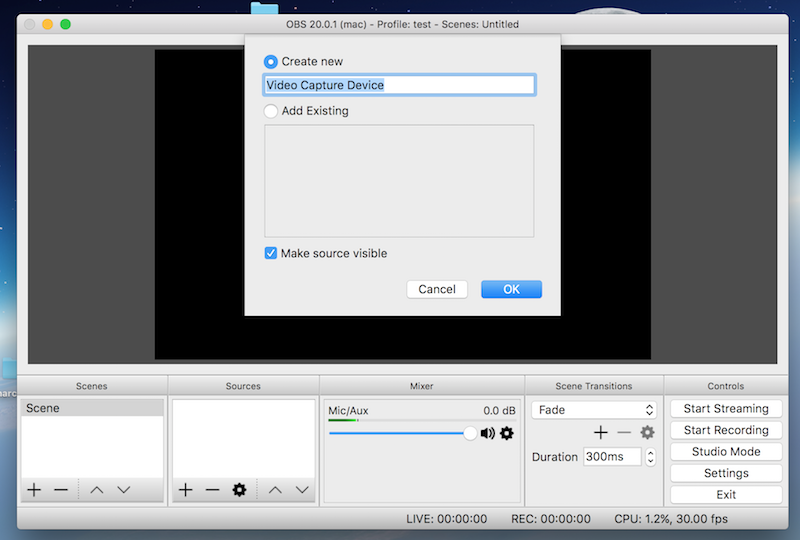
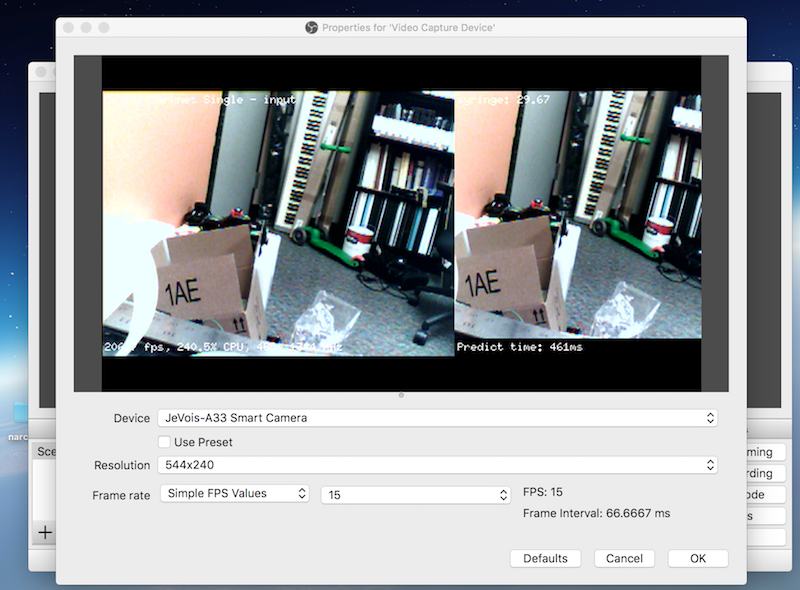
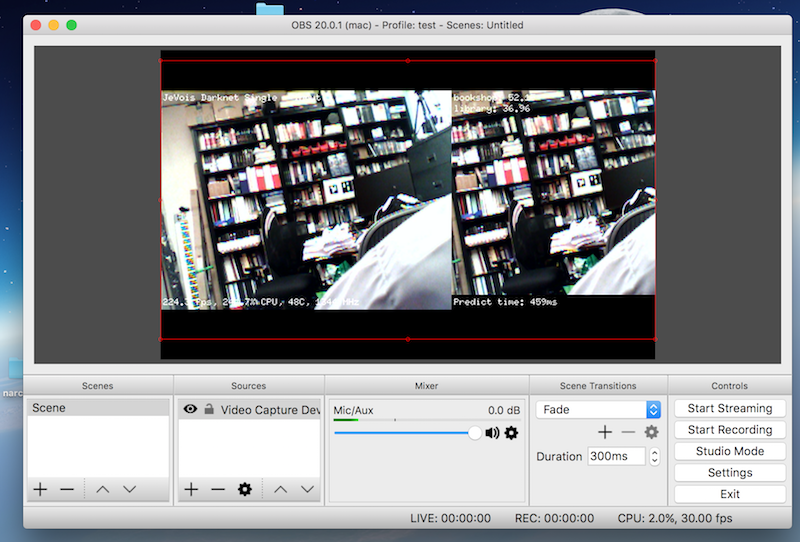
Open Broadcaster Studio is a great free program that allows you to select different video resolutions, as needed by JeVois.
+ icon under Sources to add a new video capture device. 
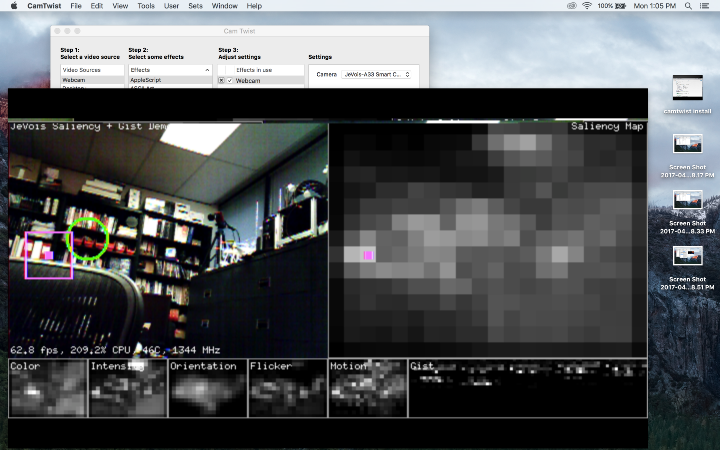
Selection of different machine vision algorithms is achieved by selecting different video resolutions in your video capture software. On Macs, most webcam apps do not allow you to select video resolution. But a few do. One example is CamTwist Studio.
To make it work:
Download CamTwist Studio. We used the latest (development) version and it worked great on our El Capitan Mac.
Install it on your Mac.
Plug in your JeVois camera, wait for orange LED flash and then solid orange LED.
Launch CamTwist Studio.
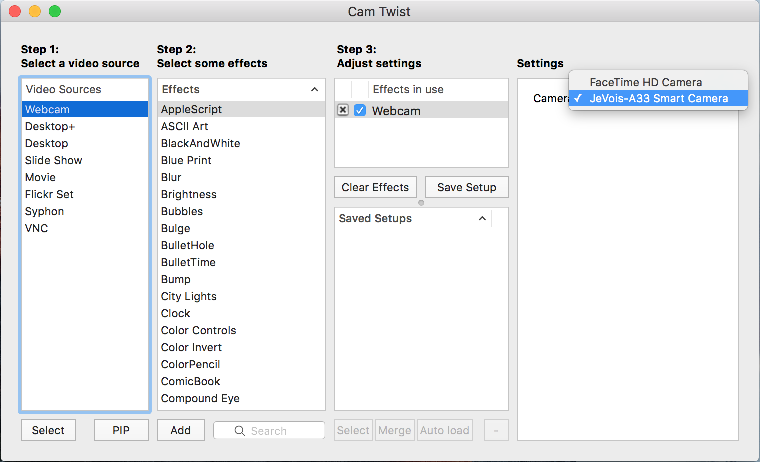
In the CamTwist window, double-click on Webcam under 'Step 1: Select a video source'.
Then under Settings at the right of the CamTwist window, select the 'JeVois A33 Smart Camera'.
On the menu bar at the top of the screen, select View -> Preview. This should show live video from your JeVois smart camera. The frame rate is not great, but that will be fixed below.By default, the resolution is 320x240 in MJPEG with no processing on the JeVois smart camera (i.e., it behaves like a regular camera).
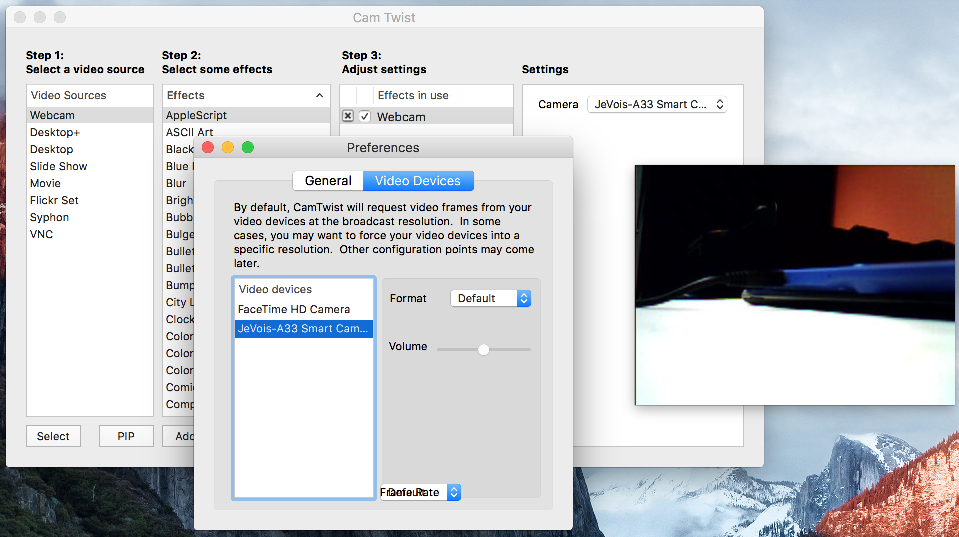
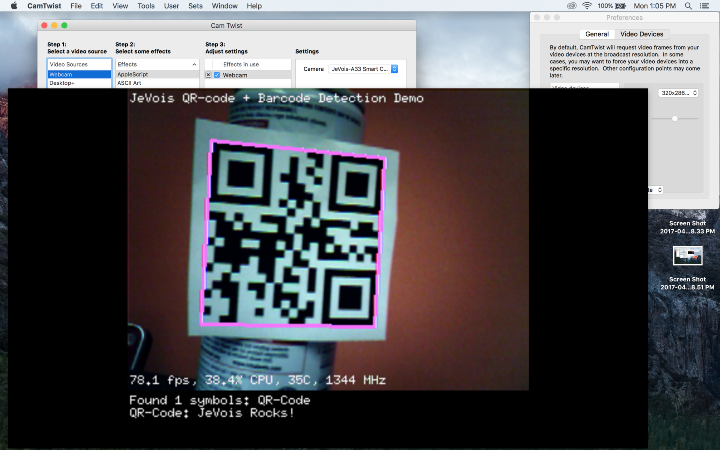
On the menu bar at the top of the screen, go to CamTwist -> Preferences. Click on 'Video Devices' towards the top of the preferences window. Then select the JeVois-A33 Smart Camera. Finally, use the Format pull-down menu to select various resolutions. Each time you select a new resolution, it will also select a different machine vision algorithm on your smart camera. See JeVois Start, under 'Demos' for a list of the default video mappings (which algorithm runs on JeVois depending on which resolution you select in CamTwist).
Under General in the Preferences window, you can change frame rate and resolution of the preview box. You need to restart CamTwist after the change. You will also need to manually drag the corner of the preview window to its full new size.
Make sure you quit your camera viewing software before you unplug your JeVois smart camera. Otherwise your host computer may become awfully confused trying to use a camera that does not exist anymore.
No shutdown procedure is needed before powering off your JeVois camera. Just close your video capture software and unplug the camera.
Download the pre-compiled ffplay binary from the ffmpeg web site at https://ffmpeg.org/download.html#build-mac (it is free), and then open a Terminal (in Applications, under Utilities) and run:
~/bin/ffplay -f avfoundation -i "JeVois" -video_size 640x300 -framerate 60 -pixel_format yuyv422
(assuming you saved ffplay into your ~/bin/ directory).
Note that on Mac, the latency (delay or lag between capture and display) is horrible with many video capture apps, including ffplay. This is not a limitation of JeVois. When used with a Linux host, there is no lag.
Nothing here so far.
 1.9.8
1.9.8
