|
JeVois
1.23
JeVois Smart Embedded Machine Vision Toolkit
|
|
|
JeVois
1.23
JeVois Smart Embedded Machine Vision Toolkit
|
|
The easiest to get started is to use JeVois-A33: JeVois Inventor graphical user interface
Below are alternative approaches.
The JeVois smart camera is used like a regular USB camera. To get started with a Windows host:
Download a disk image from http://jevois.org and flash it to a MicroSD card.
Insert MicroSD card into JeVois smart camera, with the MicroSD contacts pointing up as shown below.
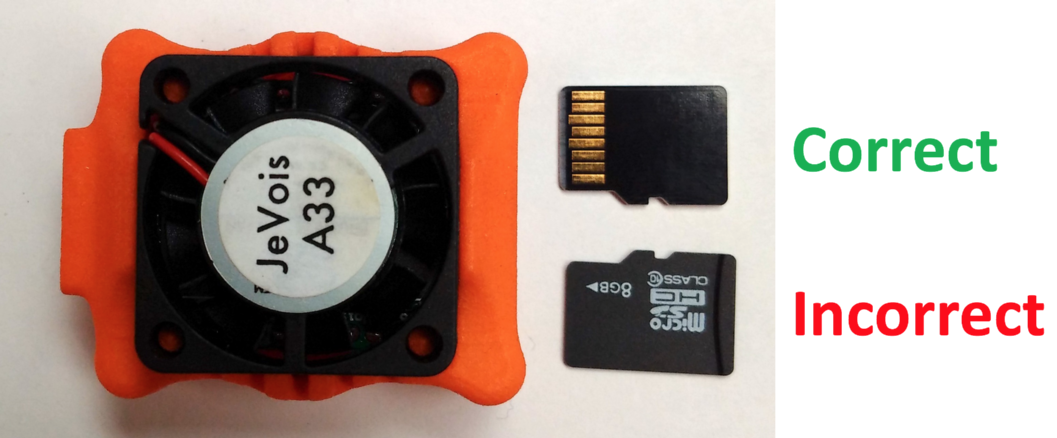
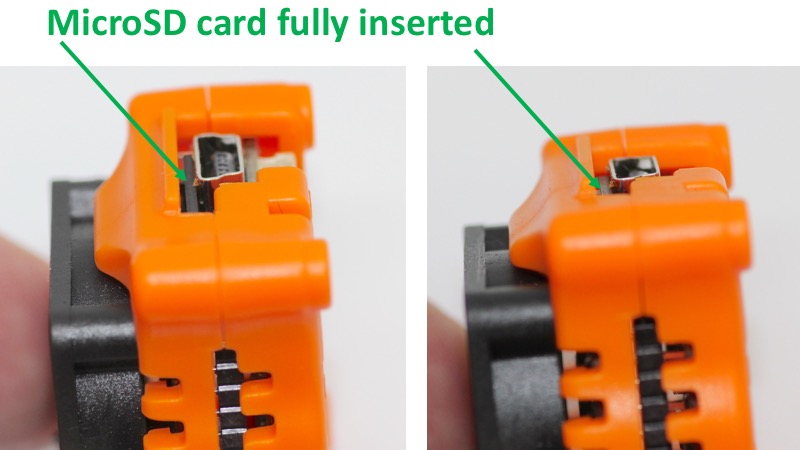
Connect camera to a host computer. The smart camera requires up to 3.5 Watts of power, which is above the limit of what a single USB 2.0 port is designed to supply, but is within the limits of a single USB 3.0 port. It is important to use a high-quality USB-to-miniUSB cable that can carry that full power without loss. Look for a cable with 24awg power wires. It is recommended that you use a USB 3.0 port on your host computer, as those provide more power. If that is not available, you can use a USB Y-cable to connect to two USB 2.0 ports on your host computer, or to one USB 2.0 port and one external USB power supply (e.g., phone charger). Make sure that you do not use a USB hub, unless that hub has a strong external power supply (transformer, wall adapter).
Observe the LED on the smart camera next to the USB connector:
Start a video capture software. You may want to try VLC, skype, etc. Here we will use AMCap.
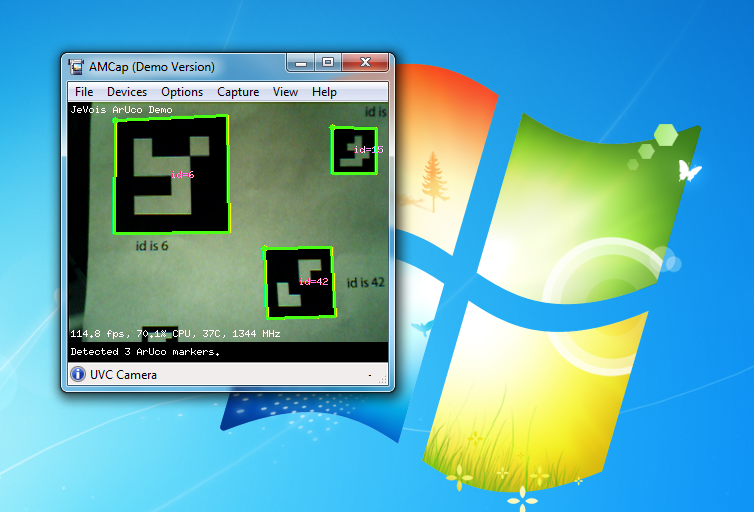
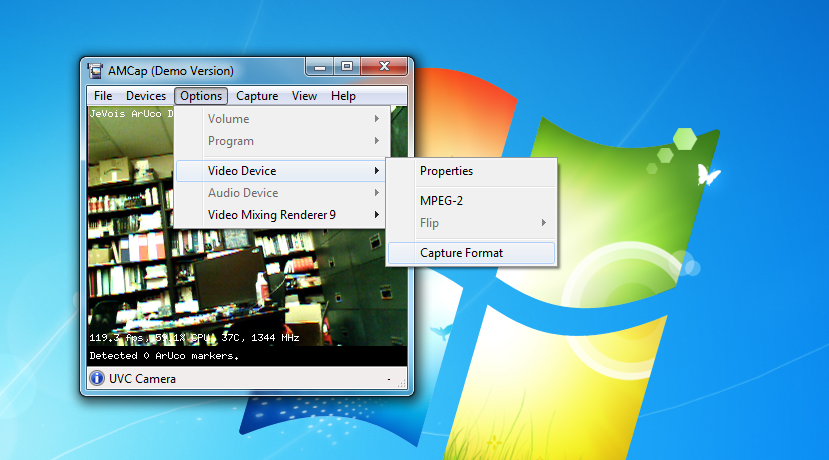
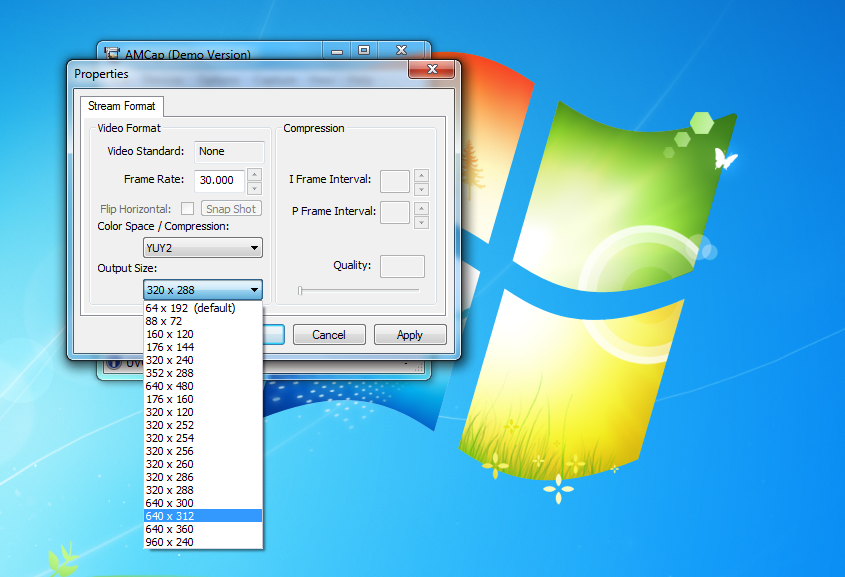
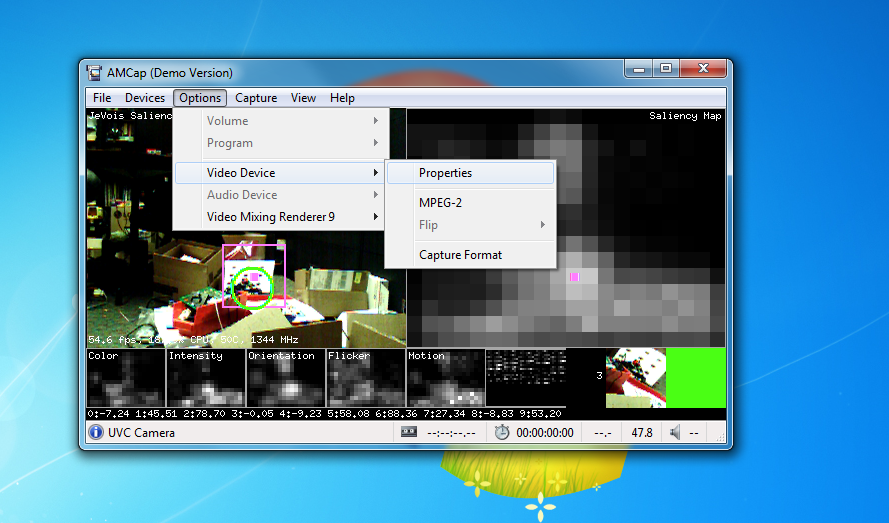
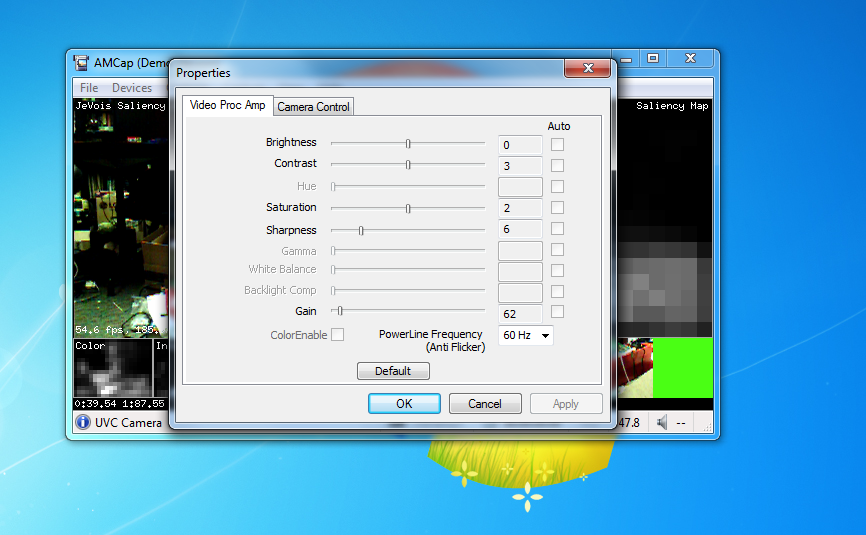
Note that on Windows and for some video software like VLC, the latency (delay or lag between capture and display) is horrible with many video capture apps. This is not a limitation of JeVois. When used with a Linux host, there is no lag.
Make sure you quit your camera viewing software before you unplug your JeVois smart camera. Otherwise your host computer may become awfully confused trying to use a camera that does not exist anymore.
No shutdown procedure is needed before powering off your JeVois camera. Just close your video capture software and unplug the camera.
Some users (but not all) of Windows 10 have reported issues with using JeVois. The camera is correctly detected and setup, but one cannot capture video from it.
Starting with JeVois v1.6.0, we have enabled a workaround which should hopefully solve the problem. It had to do with Windows 10 sending illegal requests to JeVois, to which JeVois replied with a USB stall (as it whould in such case), but Windows 10 got upset with that.
Under Windows 10, you should see the following devices when you plug JeVois in and let Windows configure it:
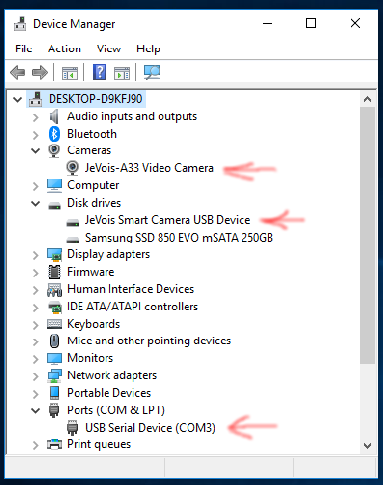
If you are using a version of JeVois software older than JeVois v1.6.0, the video camera will be named "Video Control" instead (it's another bug of Windows; it is using the name of the control unit of the camera instead of the manufacturer and product names). This is an indication that you should update to JeVois v1.6.0 or later.
Open Broadcaster Studio is a great free program that allows you to select different video resolutions, as needed by JeVois.
+ icon under Sources to add a new video capture device. 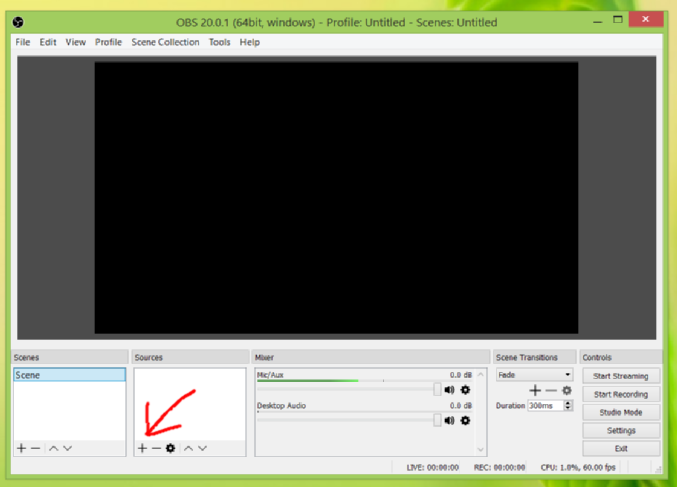
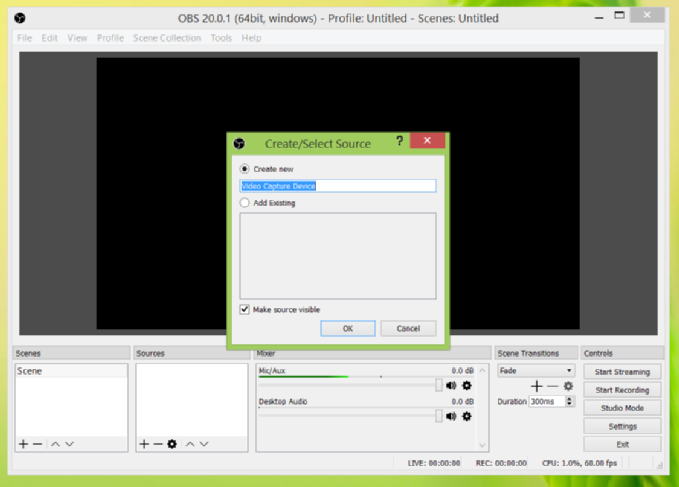
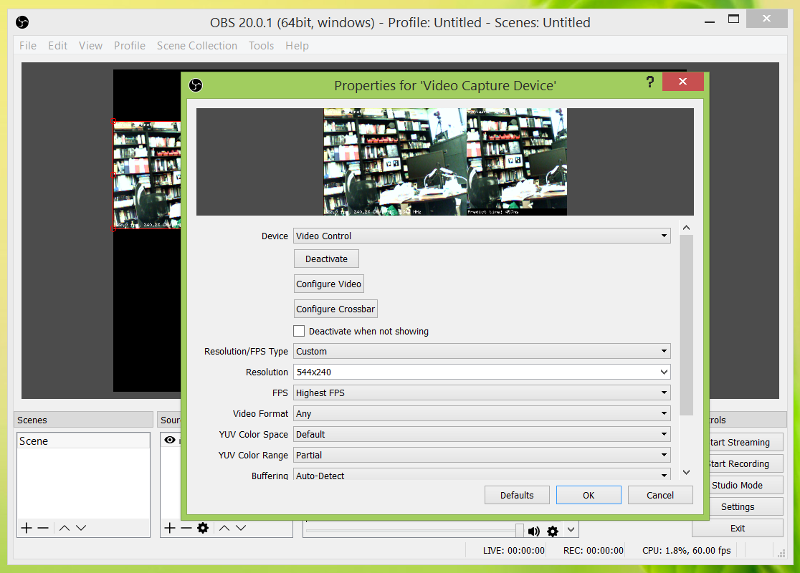
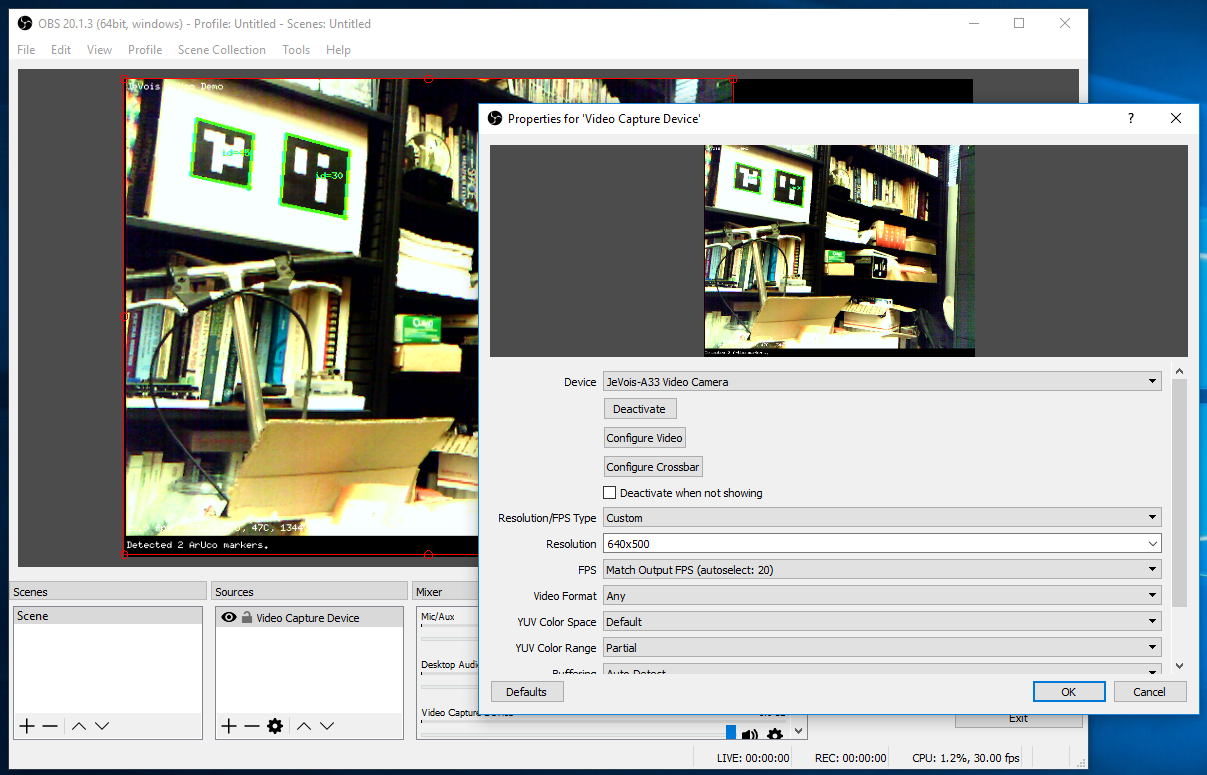
Here is JeVois v1.6.0 happily working with Windows 10:
In addition to being able to output color streaming video, JeVois can, when some machine vision algorithms are enabled, also stream greyscale video. This is particularly useful when running machine vision algorithms that produce intended for further processing on the host computer. For example, see the Edge Detection Module or the Optical Flow Module. Under windows, AMCap requires an additional filter to be installed in order to be able to capture greyscale video (in USB video specifications, greyscale is called Y800 mode).
The instructions below were contributed by JeVois user pelrun. Many thanks, pelrun!
regsvr32 c:\windows\system32\YUVxfm.dll in the command window.This will install a directshow filter which supports the Y800 mode and will allow you to use the JeVois machine vision modules that output greyscale video.
If you are having issues and use Windows 10, make sure you update to JeVois v1.6.0 or later, as we have enabled some workarounds in these later versions to deal with some bugs in Windows 10.